Introduction:
The main purpose of this document is to explain how to change WEBIDE and Eclipse development environment to a more flexible and user friendly VS Code editor.
Steps:
1. Install Node.js – Node.js® is a JavaScript runtime built on Chrome’s V8 JavaScript engine. Link
2. Install VS Code – Visual Studio Code is a code editor redefined and optimized for building and debugging modern web and cloud applications Link
3. Open the cmd and install the following packages globally . Globally means you will be able to use these packages in all projects .
- npm install -g yo – Yeoman helps you to kickstart new projects, prescribing best practices and tools to help you stay productive. Documentation
- npm install -g yo generator-easy-ui5 – This Package allows you to create a simple UI5 app. Documentation
- npm install -g yo @sap/generator-fiori-elements – This Package allows to create a Fiori application based on Work-List template. Documentation
- npm install -g yo @ui5/cli – An open and modular toolchain to develop state-of-the-art applications based on the UI5 framework. Documentation
- npm install -g npm-check-updates . This Package checks and update new versions for package.json. Documentation
- npm install -g yo @sapui5/generator-sapui5-templates . This Package allows you to create UI5 apps . Documentation
4. Install local GIT . Link
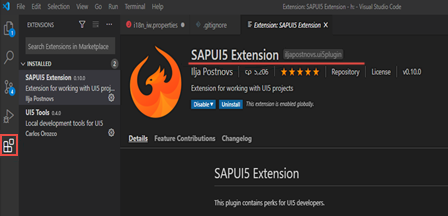
5. Open VS Code and Install SAPUI5 extensions
- SAPUI5 Extension – This plugin contains perks for UI5 developers
6. Create the project .
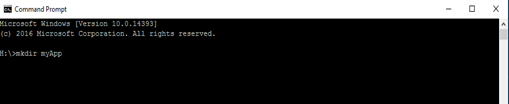
- Open cmd
- Create a new directory for the project . mkdir <myApp>
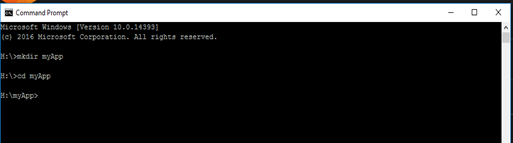
- Open a new directory . cd myApp
- Run yo @sapui5/sapui5-templates .
- Enter module name and module namespace
- Select template “SAP Fiori Worklist Application”
- Enter title and description
- Select “Standalone App”
- As Service Base URI enter: https://services.odata.org/V2/Northwind/Northwind.svc/
- As Datasource URL enter: /svc/
- In the following steps enter Object Collection: Customers, Object Collection ID: CustomerID, Object Title: CompanyName, the rest leave empty.
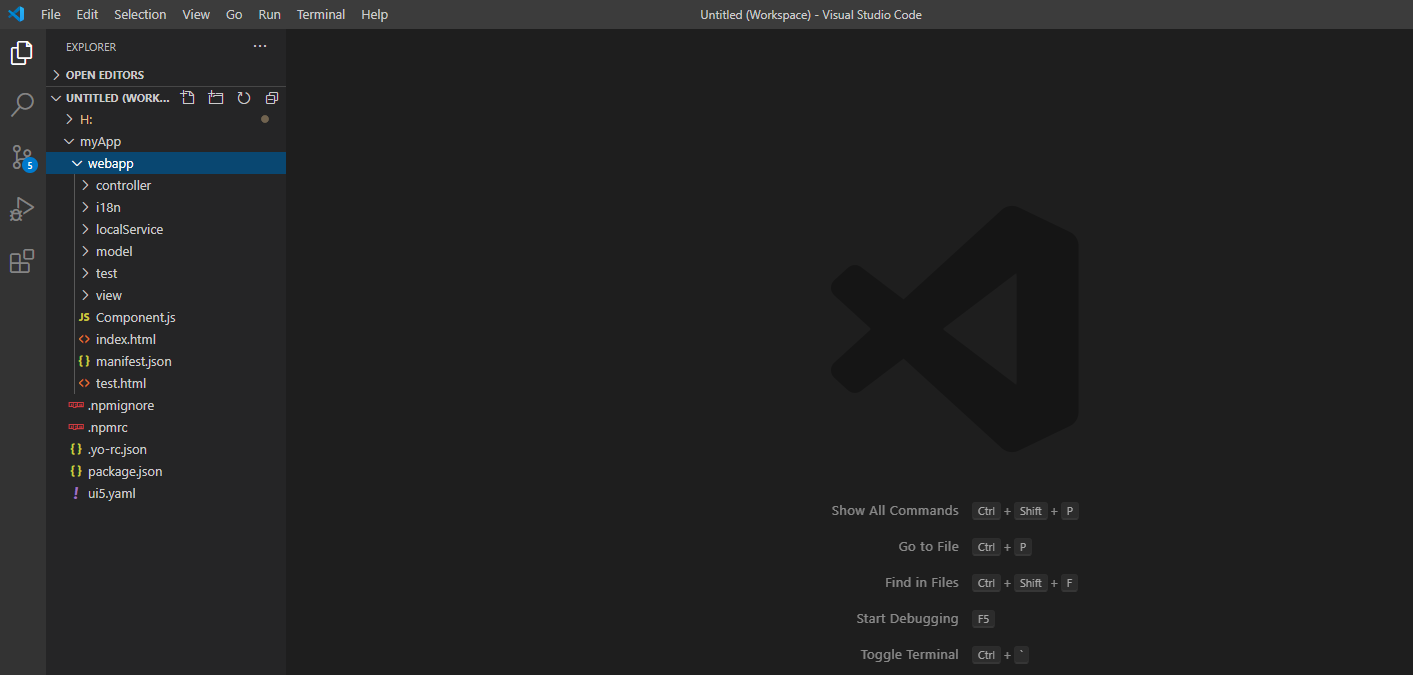
- The project was created . Open the project in VS CODE . File >> Add folder to Workspace>><myApp>Add
- Install the following packages locally . You can install the packages directly fromVS code terminal . Open VS Code Terminal >> New Terminal >> select project from list (myapp) >> press Enter
npm install npm-run-all —-save-dev – A CLI tool to run multiple npm-scripts in parallel or sequential. Documentation
npm install ui5-middleware-livereload —-save-dev – After each change in the project the system will reload the project in the browser automatically. Documentation
npm install ui5-middleware-route-proxy —-save-dev – This package allows you to get real data from the server . Documentation
npm install ui5-task-nwabap-deployer —-save-dev – This package allows you to deploy data to ABAP server . Documentation
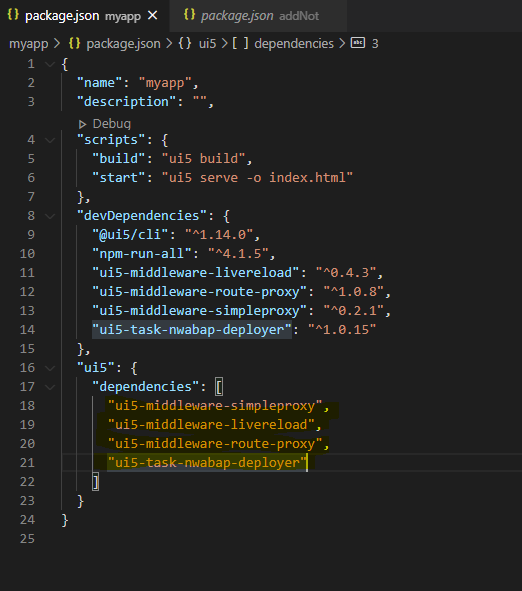
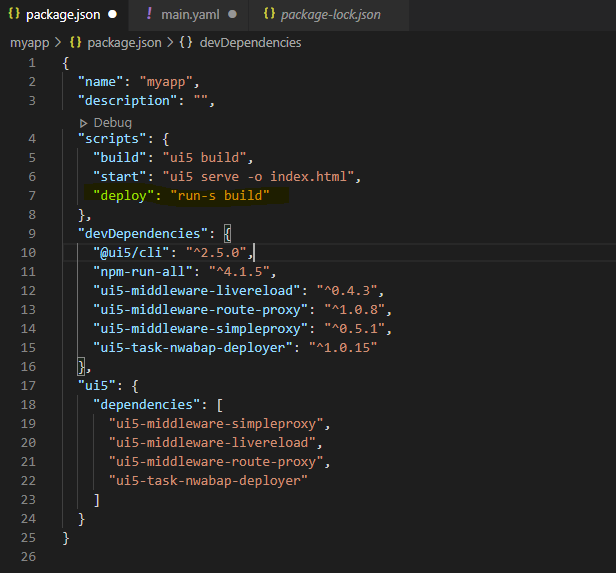
- Open package.json and look at new dependency

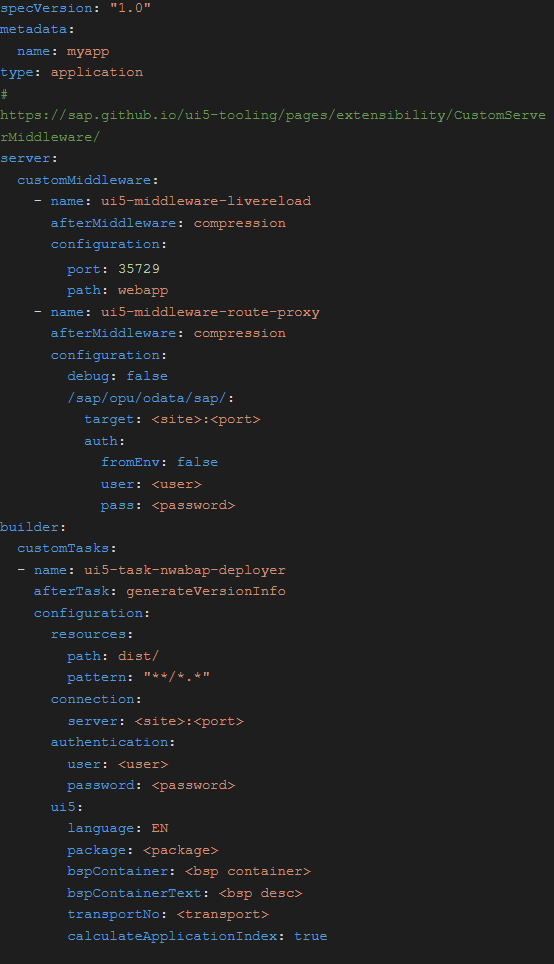
- Add manually the dependencies to the ui5 section .
- Update ui5.yaml configuration file .
- Add Deploy logic to scripts : “deploy”: “run-s build”
- Check the new versions of local dependencies and update them . Run commands
ncu -u
npm install
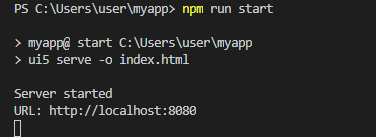
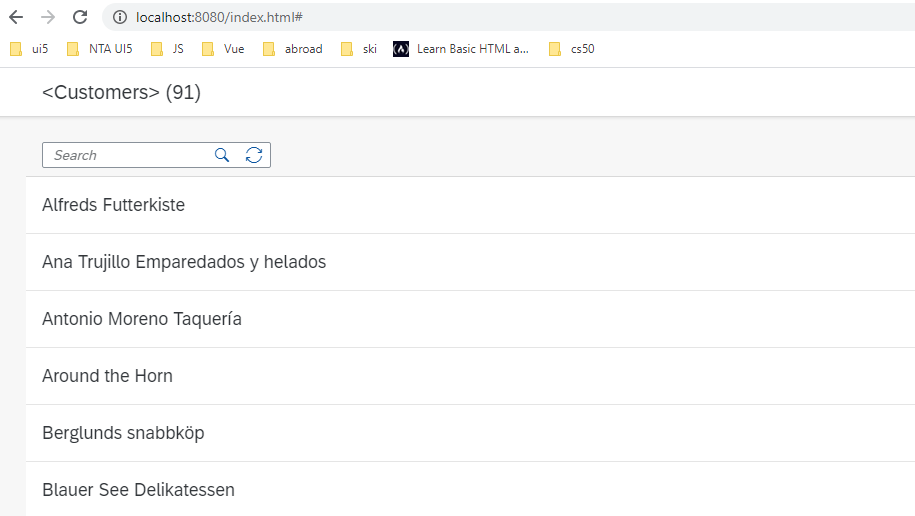
- Run the project . The system will open the tab in the browser with your project .
npm run start
7. Connect the GIT
- Add the folder .github
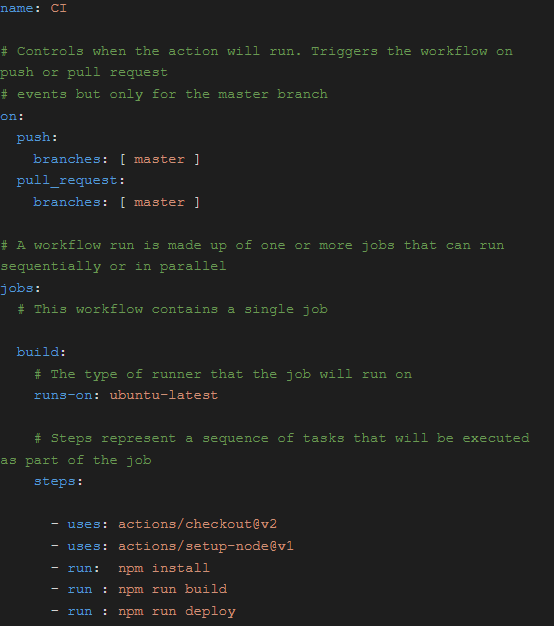
- Add the folder workflows to folder .github
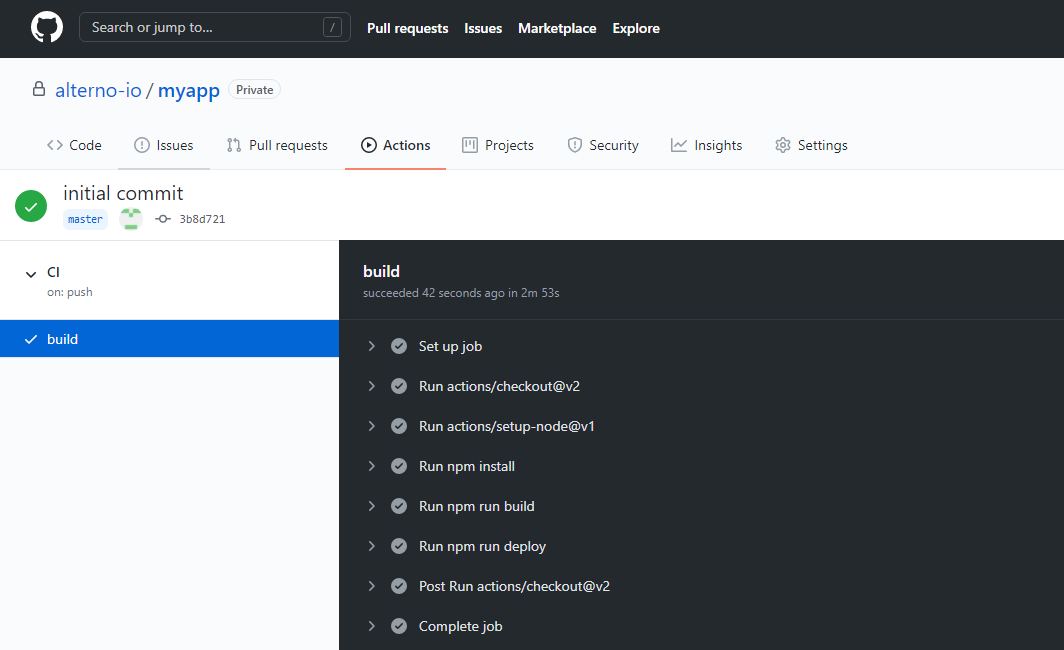
- Add the file main.yaml to folder workflows . The purpose of the main.yaml is to run the GITHUB Actions mechanism.
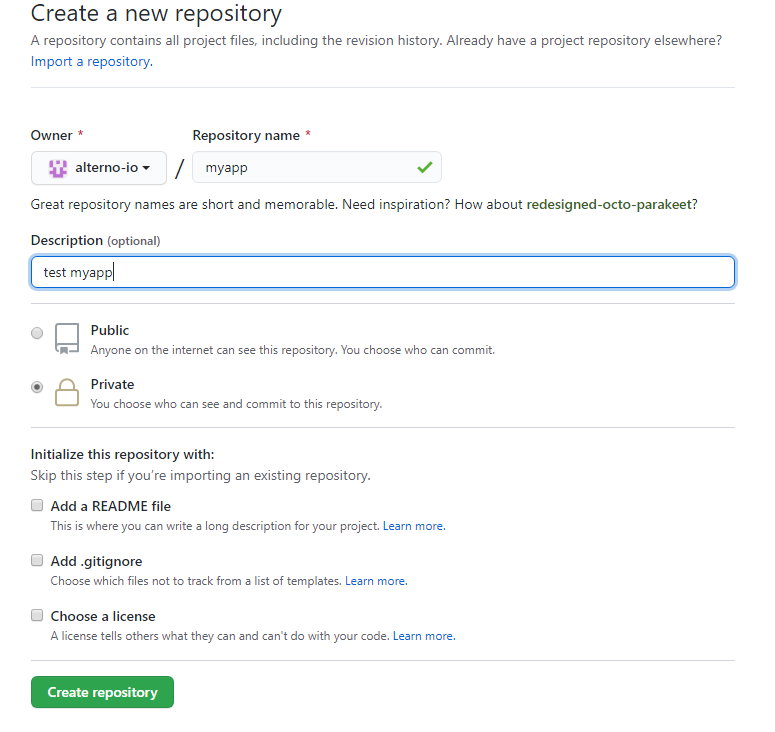
- Create a new repository in github.com
- Connect the created project to the github repository . In VS Code terminal run following commands
git init
git config user.email “you@example.com”
git config user.name “Your Name”
git remote add origin https://github.com/alterno-io/myapp.git
git add
git commit -m “initial commit”
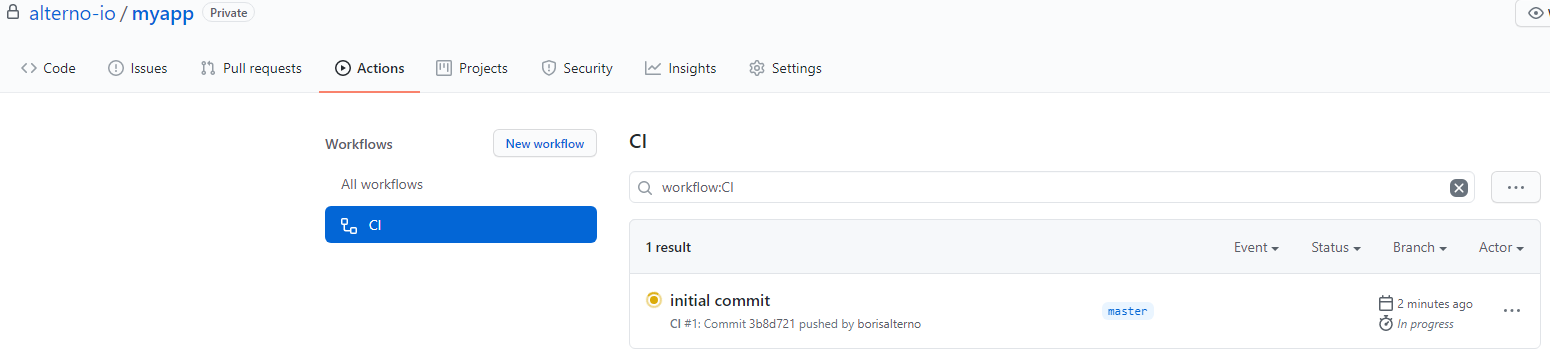
git push -f origin master - Go to github.
Open tab actions . Here you can check the job status and log.