Today we will guide you through a process of setting up a shared GIT repository, that allows developing SAPUI5 applications through collaboration.
Rule #1: even if you are a one-man-show in your project – you need GIT anyway (so you can track your changes and go back to track your modifications, instead of re-importing back your ABAP transports).
Rule #2: Use branches (will be covered in this tutorial). They help you in developing features separately and not mixing up different stuff together.
GIT Management – what’s your tool?
You should pick a GIT management platform first: there are many cloud-based alternatives on the market, such as GitBucket, GitLab, GitHub etc. All of them are a little different from management perspective, but provide the same core features at the end. It’s a matter of taste, actually, feel free to look around, see what’s your best match. You can start with freemium account anywhere, and migrate later, we choose GitBucket for some reason we can’t remember. You can also install an on-premise version, if you want to feel secure.
You can install a GIT engine on-premise and operate it through shell commands, by the way.
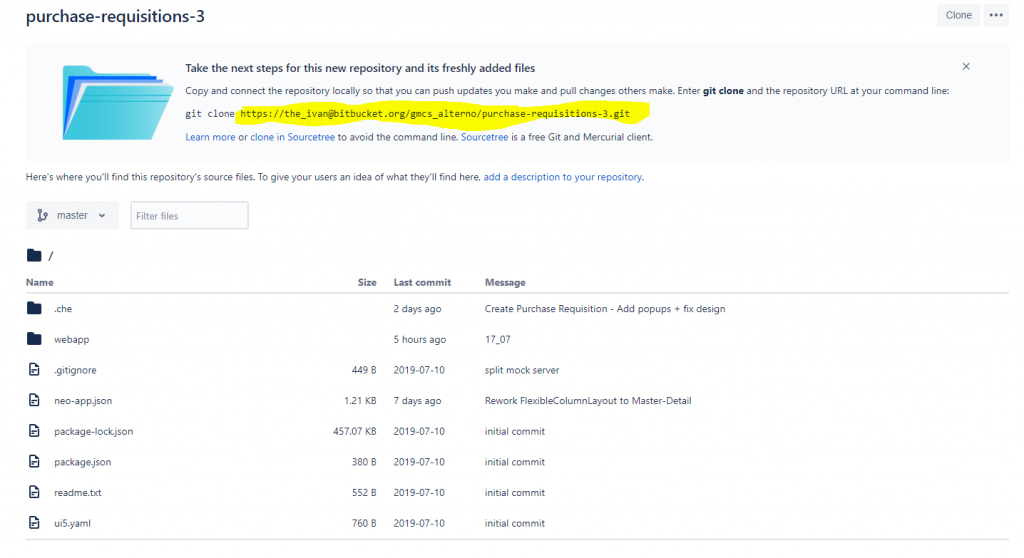
1: Create a repository
Create a blank repository on your GIT platform. Once created, you will be provided with a URL that contains your username, so you can clone it. Copy it to clipboard. Ours, for example:
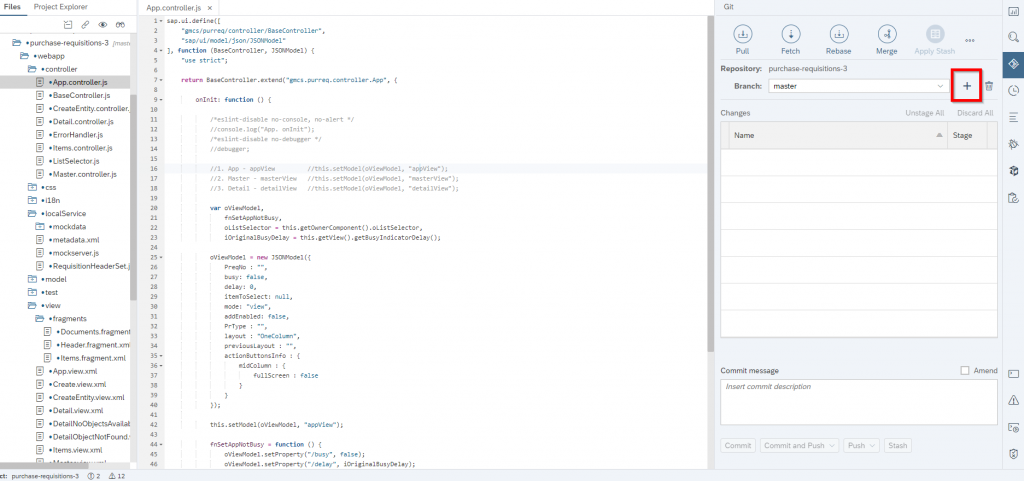
2. Clone your repository
Once you have the URL – login to your SAP WebIDE account, right click Workspace -> Git -> Clone. This action will trigger a copy process and you will “clone” a GIT project (fully, although it’s now empty yet) into your WebIDE workspace, but keeping a linkage to your “master” branch.
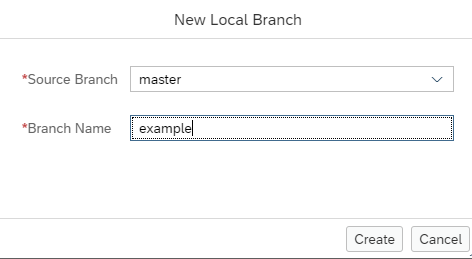
3. Create a new local branch
Open your GIT pane (on the right), and click “plus” on the branch part. Provide a meaningful name for your branch – describe in short what your change is all about, for example “Feature for Kathrin – bla bla”.
4.Develop your stuff
Once you start changing your code (either it’s XML / JS or any other file you are changing) – it will be taken into a list of changed files on your GIT pane. Only those files you’ve changed are taken, and placed into your “local” branch you’ve just created.
5. Stage & Commit
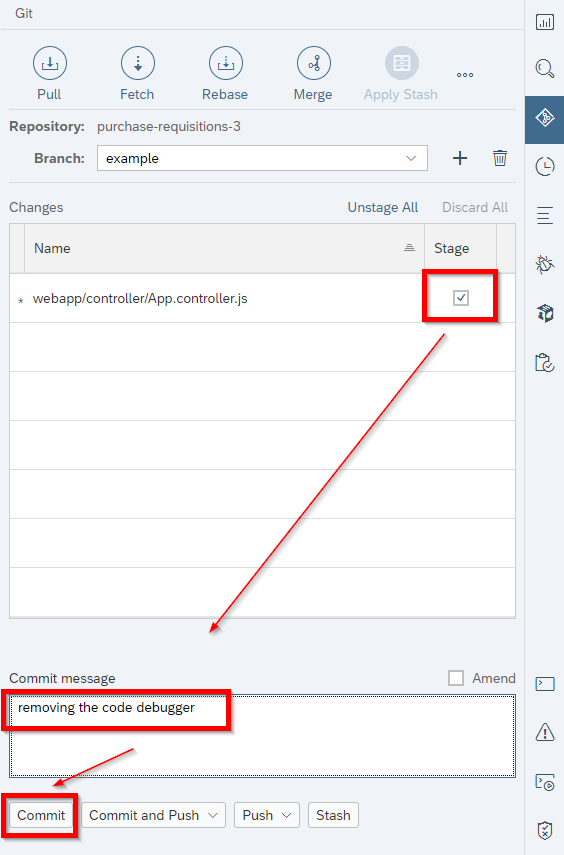
Once you are done developing, and happy with your results (either by testing through WebIDE or on your local ABAP instance) – commit your changes. Note that you are required to provide a comment about your commit – selecting ‘Amend’ will generate a comment automatically. A commit is kind-of a package that contains all files you’ve staged (you can split your development into different commits by staging selectively, if you need).
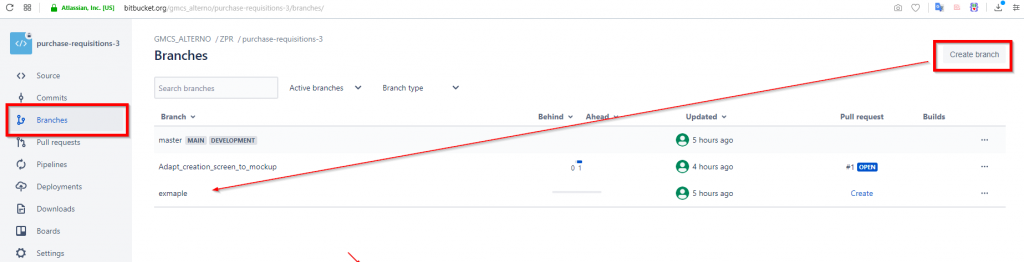
6. Create a remote branch & push your changes
Now we will create a remote branch, so we can ‘push’ our commit to the GIT repository itself (we used local WebIDE branch to commit our changes on WebIDE, now we create a remote one). In our case we use BitBucket administration console to create one:
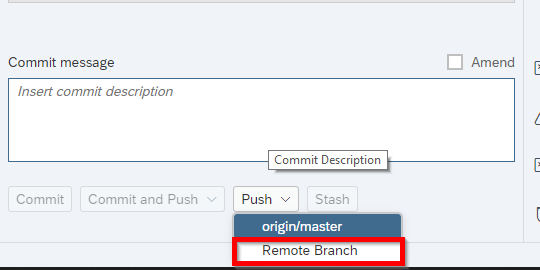
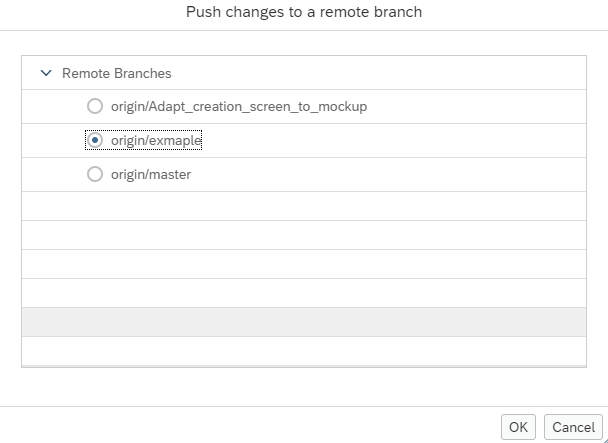
After that, pull updates by clicking ‘pull’ on your GIT pane. This will load a list of remote branches from your GIT repository, so you can push your code to a newly created branch. Once pull is completed – perform a ‘push’ action to remote branch you’ve created:
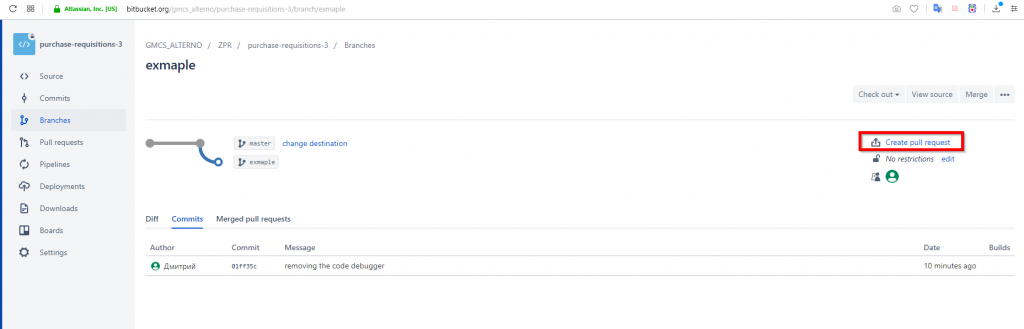
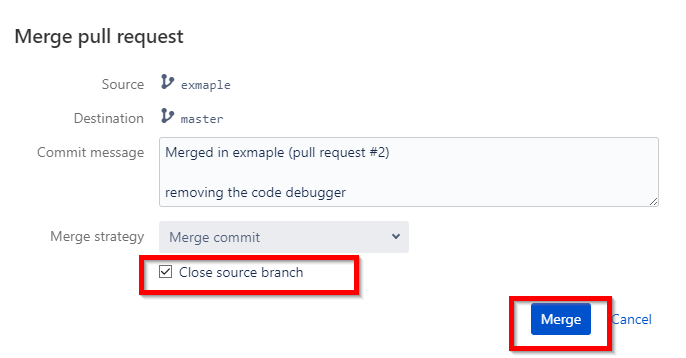
7. Merge your branch into master branch
You now have a “master” branch, which is the actual source code of your app, and a new branch that was filled with code changes. In order for this new code to move to master branch we perform a merge operation – following screenshots are from BitBucket, but you can get the idea:

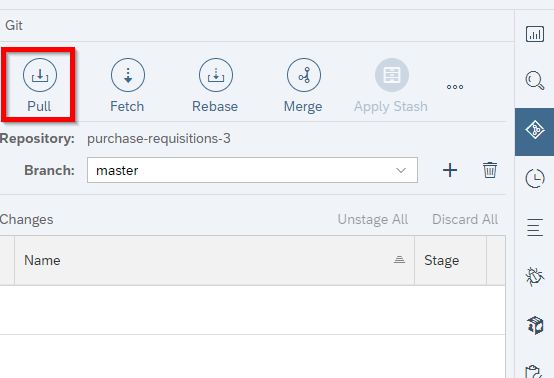
8. Pull the master branch back
Once your code is merged into the ‘master’ branch – the master on your WebIDE cloned repository is kind of outdated, right? So you go back to WebIDE, switch to ‘master’ branch, and pull. This action will sync your master branch on WebIDE with your GIT master branch.
By the way, the same step #8 needs to be applied by other developers on your team. We suggest you push your commits on a daily basis to keep things up-to-date!
In some cases, when several developers push a piece of code that touched the same file – you must resolve conflicts, but that is a different story…
For more info visit SAP Cloud Platform Integration guides