Dear friends
This week we will focus on customized tiles, the manual below will provide you all the tools to create any tile.Please feel free to contact us in case you require any assistance!
Preliminary steps
- Enter transaction /UI2/FLPD_CUST and add debug parameter to URL.
“&sap-ui-debug=true”.

- The loading take a while – its fine.
- Enter to any exists catalog with dynamic tile. Open Dev Tool [F12 in Chrome] move to network tab and search for: [ save all the files ]
- applauncher_dynamic.chip.xml
- DynamicTile-dbg.controller.js
- DynamicTile-dbg.view.js – we don’t really need it because we will create a new tile view. This view is for references.
- Go back to the Launchpad Customization page [don’t close Dev Tool yet] and click on one of the Dynamic Tiles.
- Return to Dev Tool and search for: [ save all the files ]
- Configuration.view.xml
- Configuration-dbg.controller.js
- For now you can leave Launchpad customization and Dev Tool.
Step 1 – Create a new project
- Create a new sapui5 project with Web IDE Full-Stack or Eclipse.
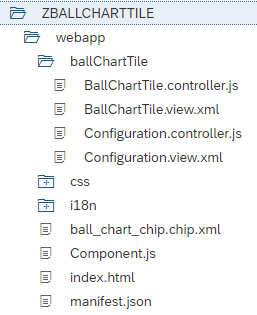
- Our project look like this:
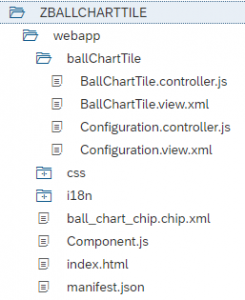
- BallChartTile.controller.js is actually copy of Dynamic Tile-dbg.controller.js.
- Configuration controller and view are the same from previous stage.
- Create new view – BallChartTile.view.xml, example code :
<?xml version="1.0" encoding="UTF-8"?>
<core:View
xmlns="sap.suite.ui.commons"
xmlns:ui="sap.suite.ui.microchart"
xmlns:core="sap.ui.core"
xmlns:m="sap.m"
controllerName="ballChartTile.BallChartTile">
<m:GenericTile
id="kpiTile"
press="onPress"
header= "{/config/display_title_text}"
subheader="{/config/display_subtitle_text}">
<m:tileContent>
<m:TileContent id="tileChart">
<m:content>
<ui:HarveyBallMicroChart total="{/data/chart/Total}" totalScale="Mrd">
<ui:items>
<ui:HarveyBallMicroChartItem fraction="{/data/chart/Fraction}" color="{/data/chart/Color}" fractionScale="Mrd" />
</ui:items>
</ui:HarveyBallMicroChart>
</m:content>
</m:TileContent>
</m:tileContent>
</m:GenericTile>
</core:View>
- Ball_Chart_chip.chip.xml is a change copy of applauncher_dynamic.chip.xml , don’t forget to change
viewName , example code :<?xml version="1.0" encoding="UTF-8"?> <chip xmlns="http://schemas.sap.com/sapui2/services/Chip/1"> <implementation> <sapui5> <viewName>ballChartTile.BallChartTile.view.xml</viewName> </sapui5></implementation> <appearance> <title>Ball Chart Tile</title> <description>Chart Tile</description> </appearance> <contracts> <consume id="configuration"> <parameters> <parameter name="tileConfiguration"> </parameter> <!-- <parameter name="col">2</parameter> --> </parameters> </consume> <consume id="preview" /> <consume id="writeConfiguration" /> <consume id="configurationUi" /> <consume id="search" /> <consume id="refresh" /> <consume id="visible" /> <consume id="bag" /> <consume id="url" /> <consume id="actions" /> <consume id="types"> <parameters> <parameter name="supportedTypes">tile,link</parameter> </parameters> </consume> </contracts> </chip> - To create 2×1 Tile you need to set parameter ‘col’ to 2 in Ball_Chart_chip and add Frame Type attribute to Generic Tile in BallChartTile.view.xml.
- Change all resource used name to yours – change all occurrences of “sap.ushell.components.tiles.applauncherdynamic “
- Deploy the project.
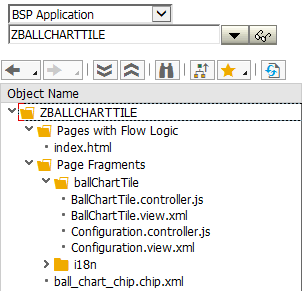
- Search your project inside SE80 -> BSP Application
Stage 2 – Edit configuration page
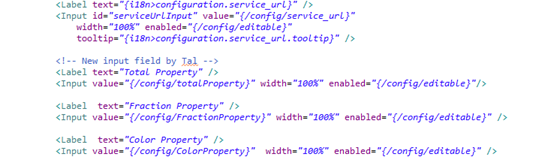
- We want to create 3 more input fields because we want to set total value, fraction value and color.
- We are going to use the input fields to determine which values will be used in OData query.
- Go to Configuration.view.xml and enter 3 more input fields below the Service URL.
Stage 3 – Edit BallChartTile controller
- Go to Tile controller and find onSaveConfiguration
- Edit configToSave:
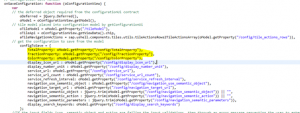
- Go to successHandleFn function, example code:

successHandleFn: function (oResult) {
var oView = this.getView();
var oConfig = this.getView().getModel().getProperty("/config");
this.oDataRequest = undefined;
var oData = oResult,oDataToDisplay;
if (typeof oResult === "object") {
var uriParamInlinecount = jQuery.sap.getUriParameters(oConfig.service_url).get("$inlinecount");
if (uriParamInlinecount && uriParamInlinecount === "allpages") {
oData = {number: oResult.__count};
} else{
oData = this.extractData(oData);
}
} else if (typeof oResult === "string") {
oData = {number: oResult};
}
var ChartData = {
Total : oResult.results[oConfig.TotalProperty],
Fraction :oResult.results[oConfig.FractionProperty],
Color :oResult.results[oConfig.ColorProperty]
};
oView.getModel().setProperty("/data/chart", ChartData);
oView.setBusy(false);
},
Step 4 – Register the chip
- Enter transaction /UI2/CHIP and create a new chip.
URL – Use the absolute path to your chip definition file.
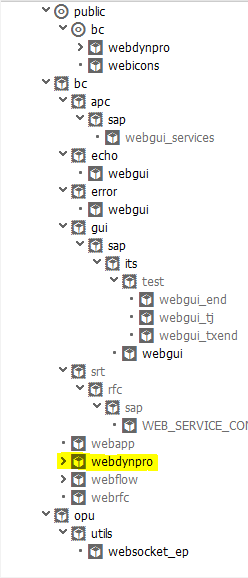
- Now go to transaction SICF write under serviceName “web*” and run.
You should see a “webdyn pro” folder
- Open the folder>sap>CUSTOMIZE_COMPONENT.
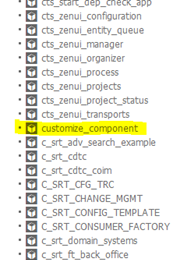
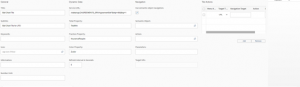
If the service is disable (like you see in the picture) – press right click and Active Service.
When your link is active – press right click and Test Service. - Now we will change the existing tiles catalog, set parameters as follows – pick /UI2/CHIP_CATALOG_CONFIG as Component Name and /UI2/FLPD_CATALOG as Configuration ID.
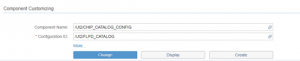
- Hit ‘Change’. If the configuration ID isn’t existing – hit ‘Create’.
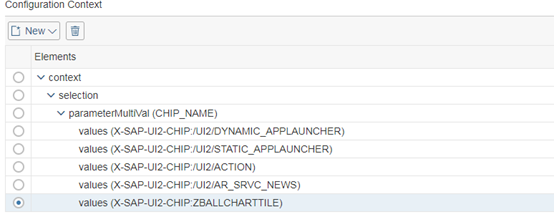
- Open Context > Selection, select parameterMultiVal and click New > values from the Toolbar.
You will see an input field you must enter chip name as follows.
X-SAP-UI2-CHIP: <your_chip_name>
chip name is the same used in transaction /UI2/CHIP [at the start of this stage].


Save and close the browser.
Stage 5 – Create a new Tile
- Before we start I suggest to clean cache:
open SMICM transaction Go-To > HTTP Plug-In > Server Cache > Invalidate locally - Open transaction /UI2/FLPD_CUST , select one existing catalog.
- Create a new tile if you don’t see our created tile you need to clean the browser cache.
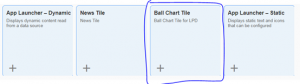
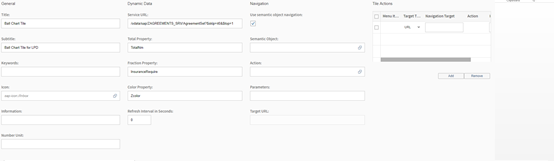
- Configuration page will open and you should see our new input fields.
- In the service URL we need set an OData query url and in our new fields we need set some properties , example of OData:
<m:properties xmlns:m="http://schemas.microsoft.com/ado/2007/08/dataservices/metadata" xmlns:d="http://schemas.microsoft.com/ado/2007/08/dataservices">
<d:TotalNm>100</d:ContractType>
<d:InsuranceRequire>23</d:InsuranceRequire>
<d:Zcolor>Good</d:Zcolor>
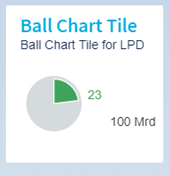
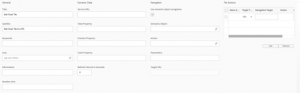
- Our configuration page look like this :
- Add the new tile to group and go to LPD to see your new Tile.
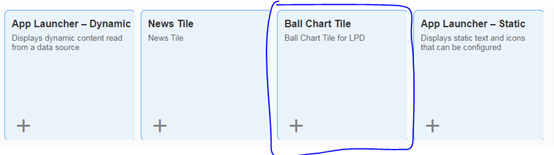

![]()
Feel free to contact us in case you would like to have a brainstorming over your specific SAPUI5 requirement.